Setting up your Pi
Background to Raspberry Pi
Raspberry Pi is a small computer that can perform many of the same tasks as our computers at home. The device can be plugged into a monitor and controlled with a keyboard and mouse to be used as a fully functioning computer. It is low-cost, modular, and high performing, originally developed for teaching purposes for computer science students but growing into much more.

Learn more about Raspberry Pi at these links below:
- https://en.wikipedia.org/wiki/Raspberry_Pi
- https://thepihut.com/blogs/raspberry-pi-tutorials/the-raspberry-pi-tutorial-beginners-guide
- https://www.edureka.co/blog/raspberry-pi-tutorial/
Installing the camera
You have been supplied with a Pi camera module. The following animation (from the offical raspberry pi website) shows how to connect it.

Installing the SenseHat


Important!
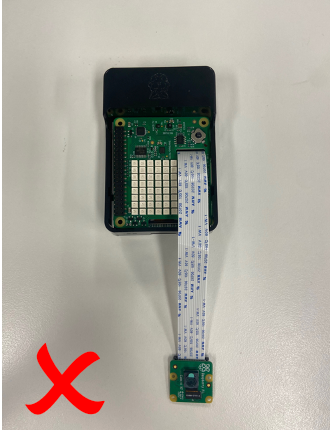
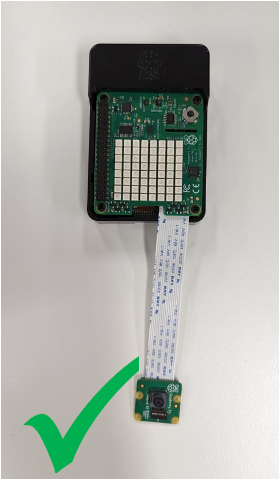
Route the camera cable under the sense hat.
Do not use the cable slot in the sense piece. The cable should stay between the pi and sense hat poking out of the bottom.
Follow the assembly as followed in the pictures below


Mounting the camera
Find a way to mount the camera, use your imagination.